The Twilio/Wigle.net Street Vector data set provides a complete database of US street names and address ranges mapped to zip codes and latitude/longitude ranges, with DTMF key mappings for all street names. The complete description about this data set can be found on Amazon Web Service. This article will mainly focus on how to use the install and this data set in Amazon AWS. Here’s an overview before getting started :
- Create an AWS account, or use an existing one
- Create a public dataset volume
- Create a Linux instance
- Install MySQL database
- Mount the public dataset volume to Linux instance
- Copy the data into MySQL server
- Use it via any MySQL client
Create an AWS account
Go to aws.amazon.com and click Create an AWS Account. Your personal information will be required including the credit card number by Amazon AWS. So if you don’t want your information to be used or you don’t want to be charged for any potential fee, this article is not suitable for you. This part is not specified to the public data set, but it is due to the usage of Amazon Web Service.
If you’ve created your account or have an existing one, please sign in and connect to the AWS console via your web browser.
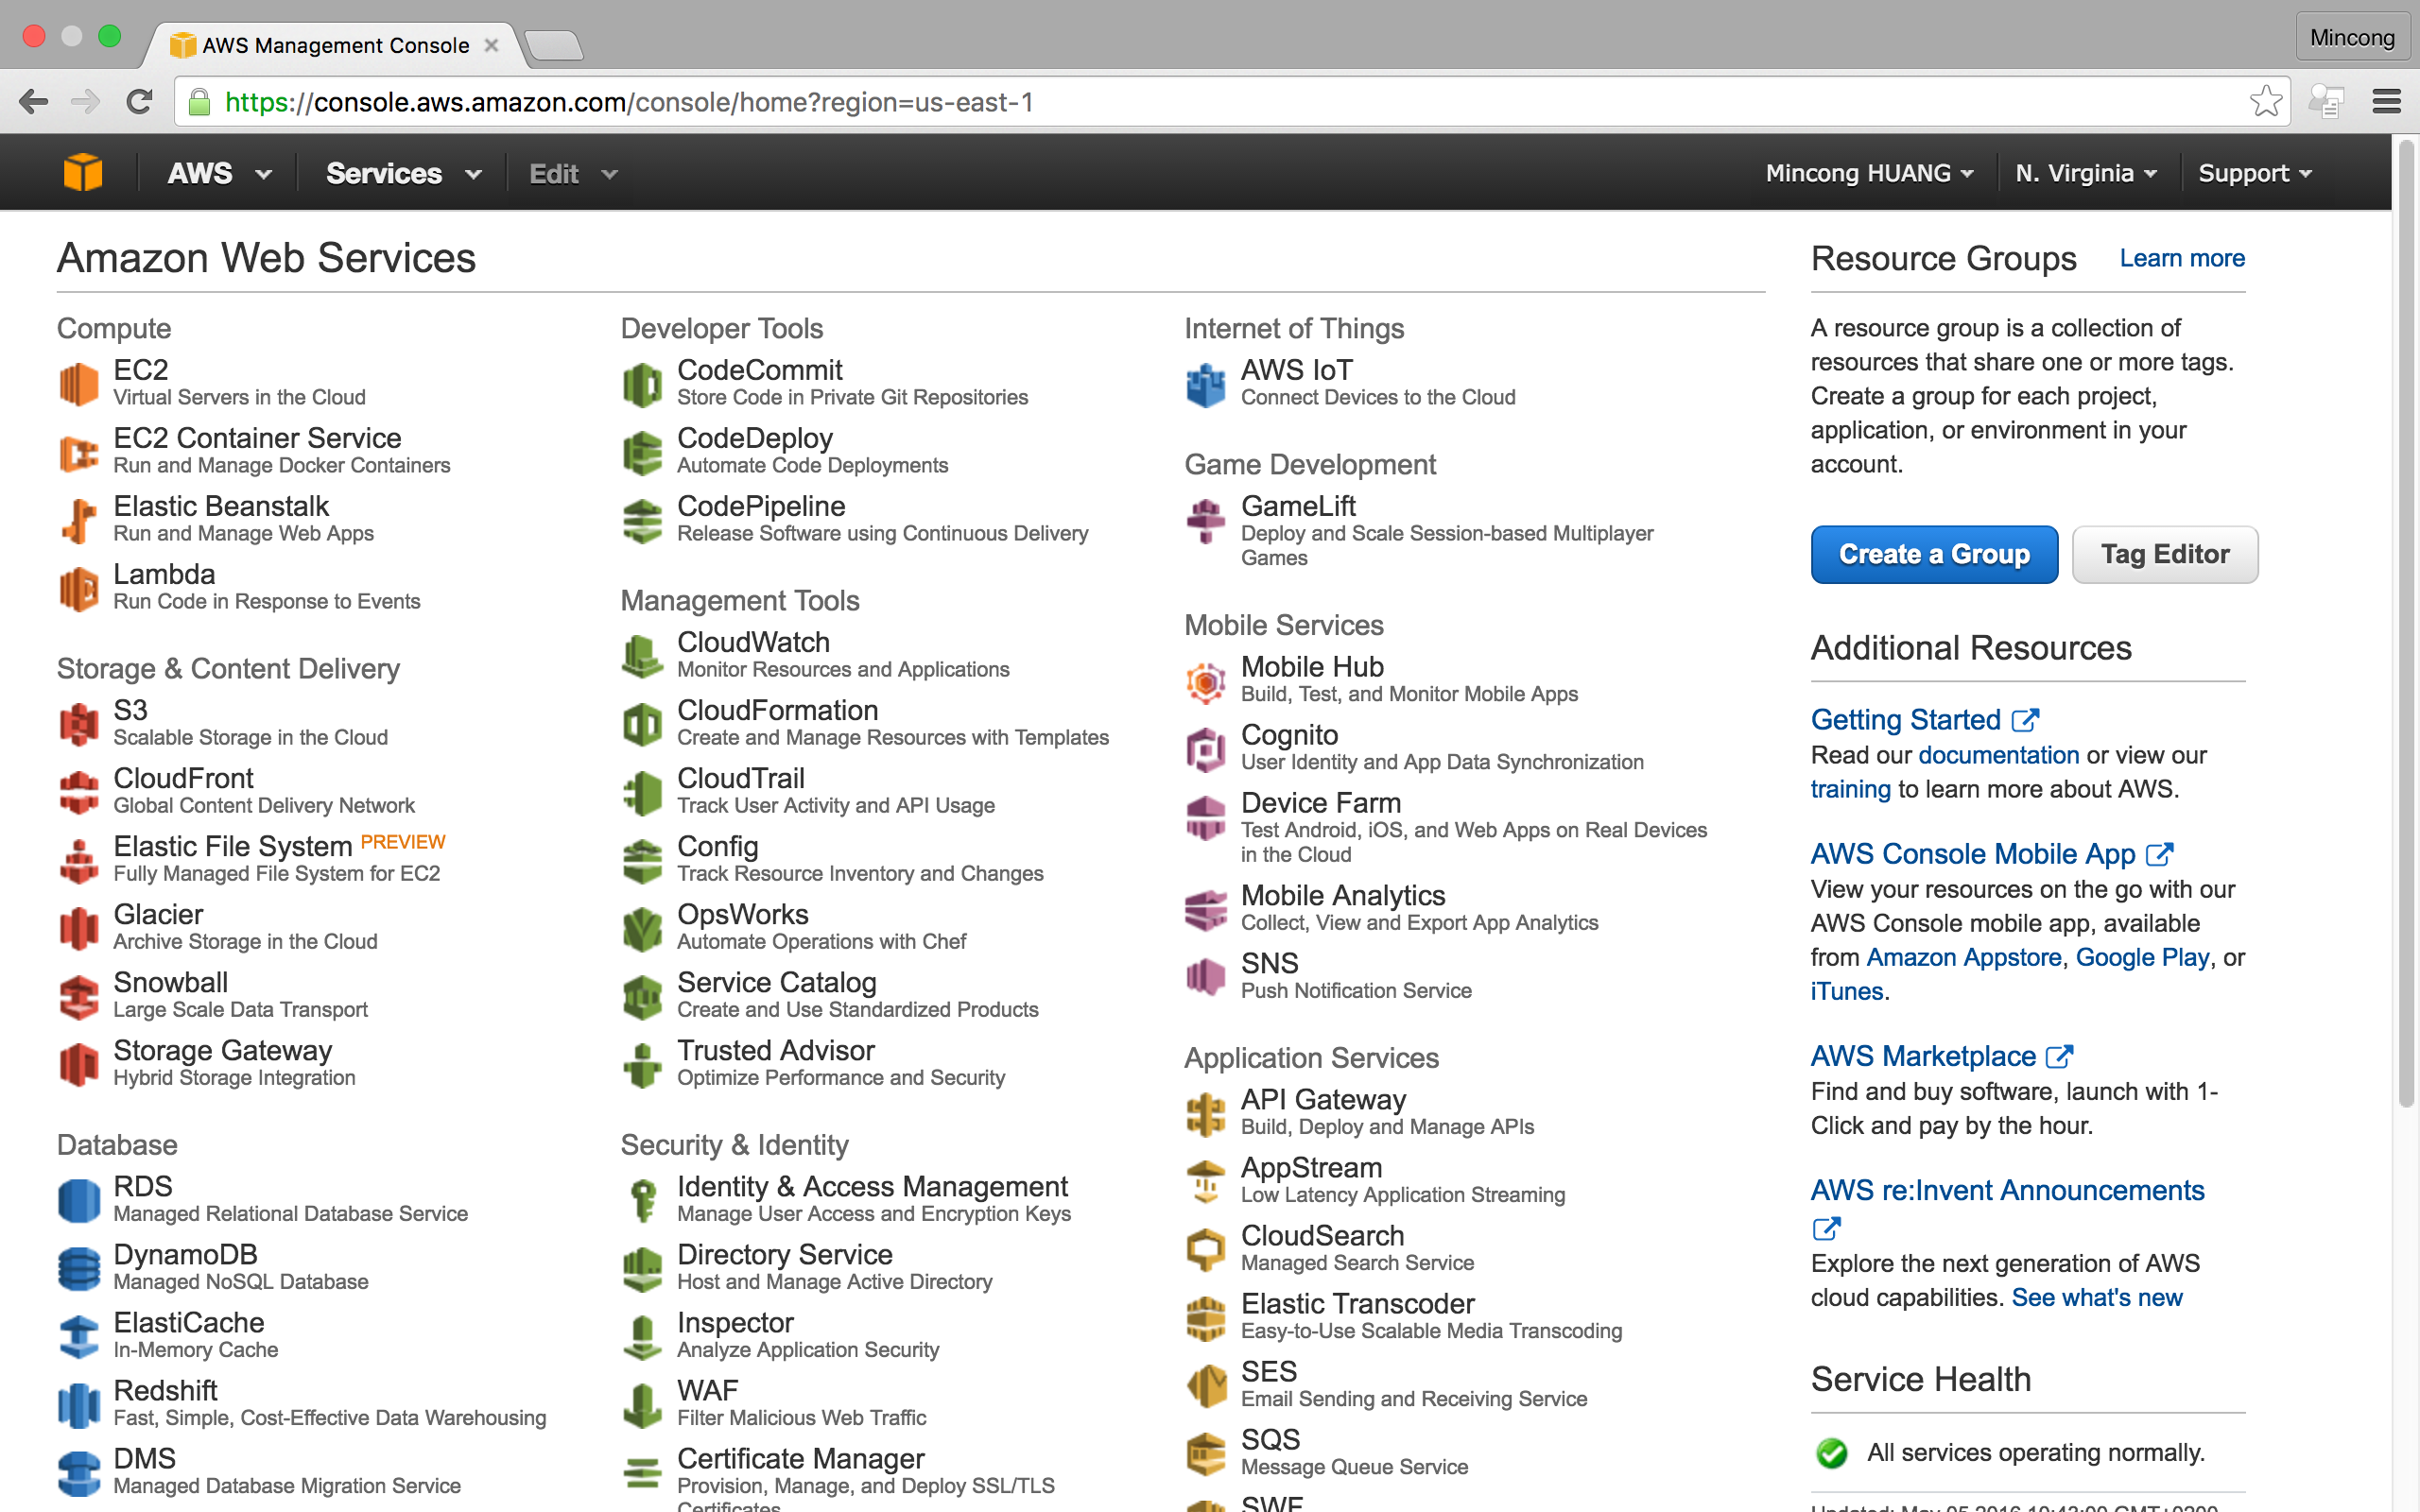
Create a public dataset volume
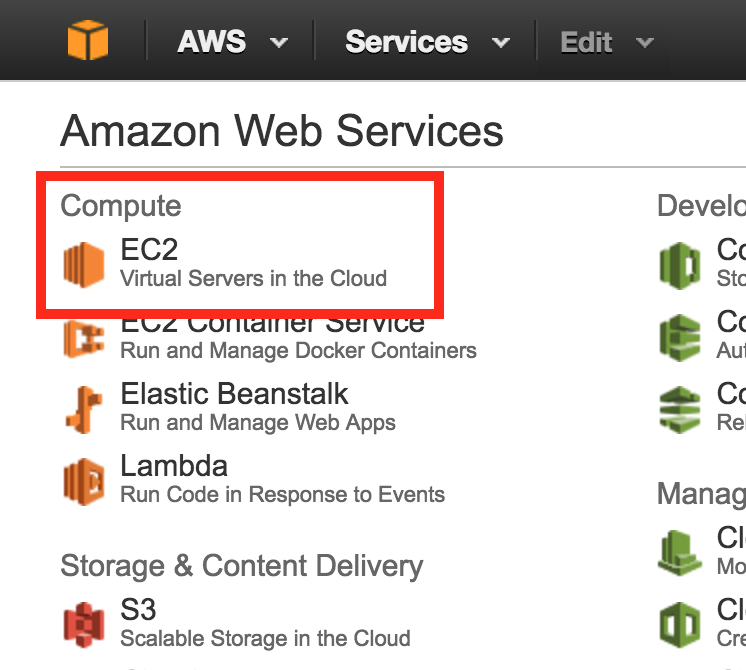
On the left side of your AWS console, click Compute > EC2
Then look at the left navigation panel, click ELASTIC BLOCK STORE > Volumes.
Create Volume. The Twillio / Wigle.net Street Vector data set is only avaible
on the zone us-east-*, so please pay attention and do not use another zone,
such as us-nord-*. You can see the zone in your URL. Otherwise, the Snapshot
ID snap-5eaf5537 won’t be show in the available Snapshot ID list. It doesn’t
matter if you’re using us-east-1, us-east-2 or else, but I recommend you to
use the same zone for your volume and your Linux server for better performance.
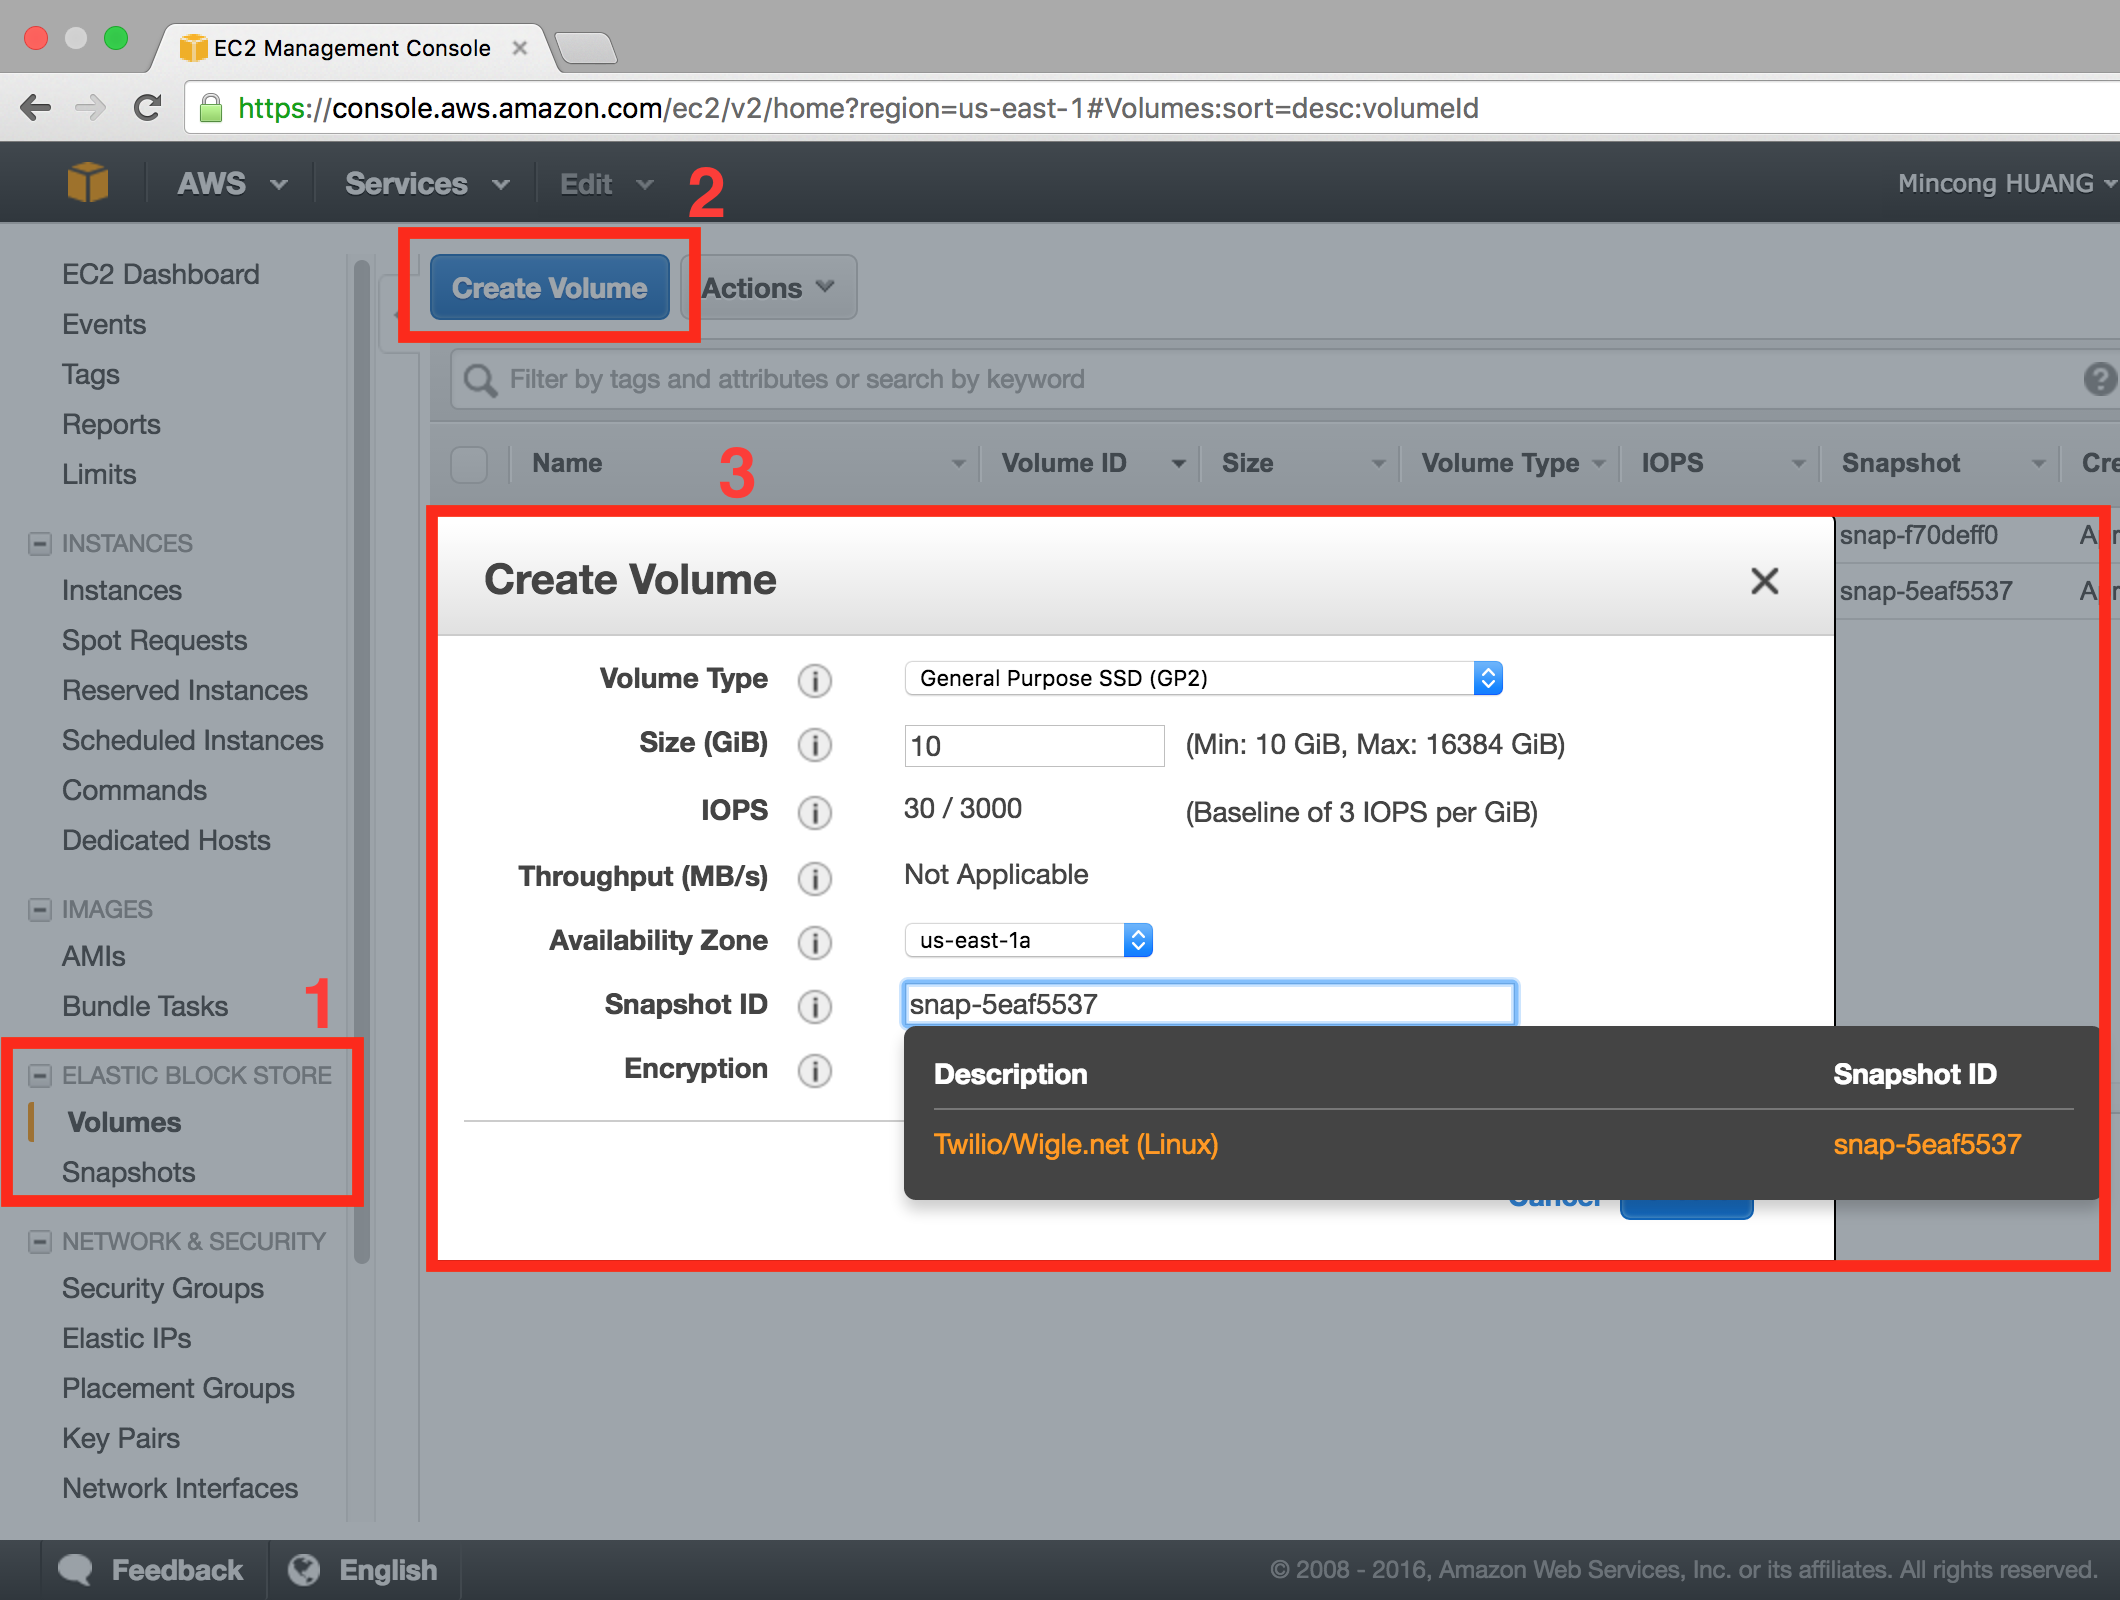
Once the create button is clicked, your volume will be created and available in
a few minutes. Rename the volume, such as
Twilio/Wigle.net Street Vector Data Set.
Create a Linux instance
Now, we need a Linux instance to use the public dataset. The volume created previously is a block of data without OS, like an USB device. So it cannot be used directly. That’s why we need to create a linux instance and install MySQL database.
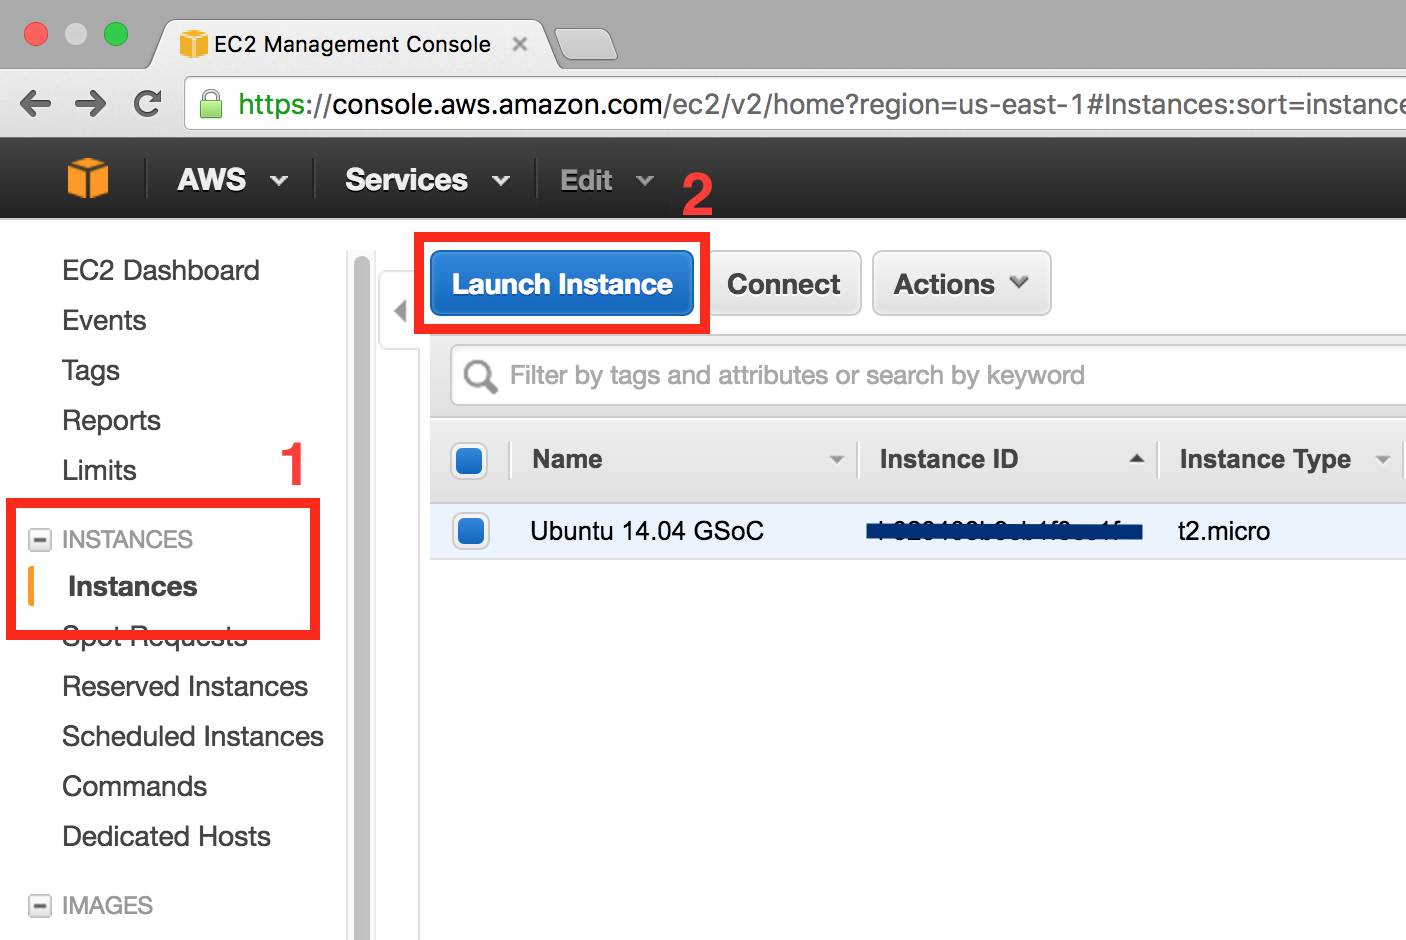
On the navigation bar on the left side, there’s an option called Instances. Click INSTANCES > Instances to create an new instance :
Step 1: Choose an Amazon Machine Image (AMI)
An AMI is a template that contains the software configuration (operating system, application server, and applications) required to launch your instance. You can select an AMI provided by AWS, our user community, or the AWS Marketplace; or you can select one of your own AMIs. Here we use the Ubuntu Server 14.04 LTS (HVM), SSD Volume Type.
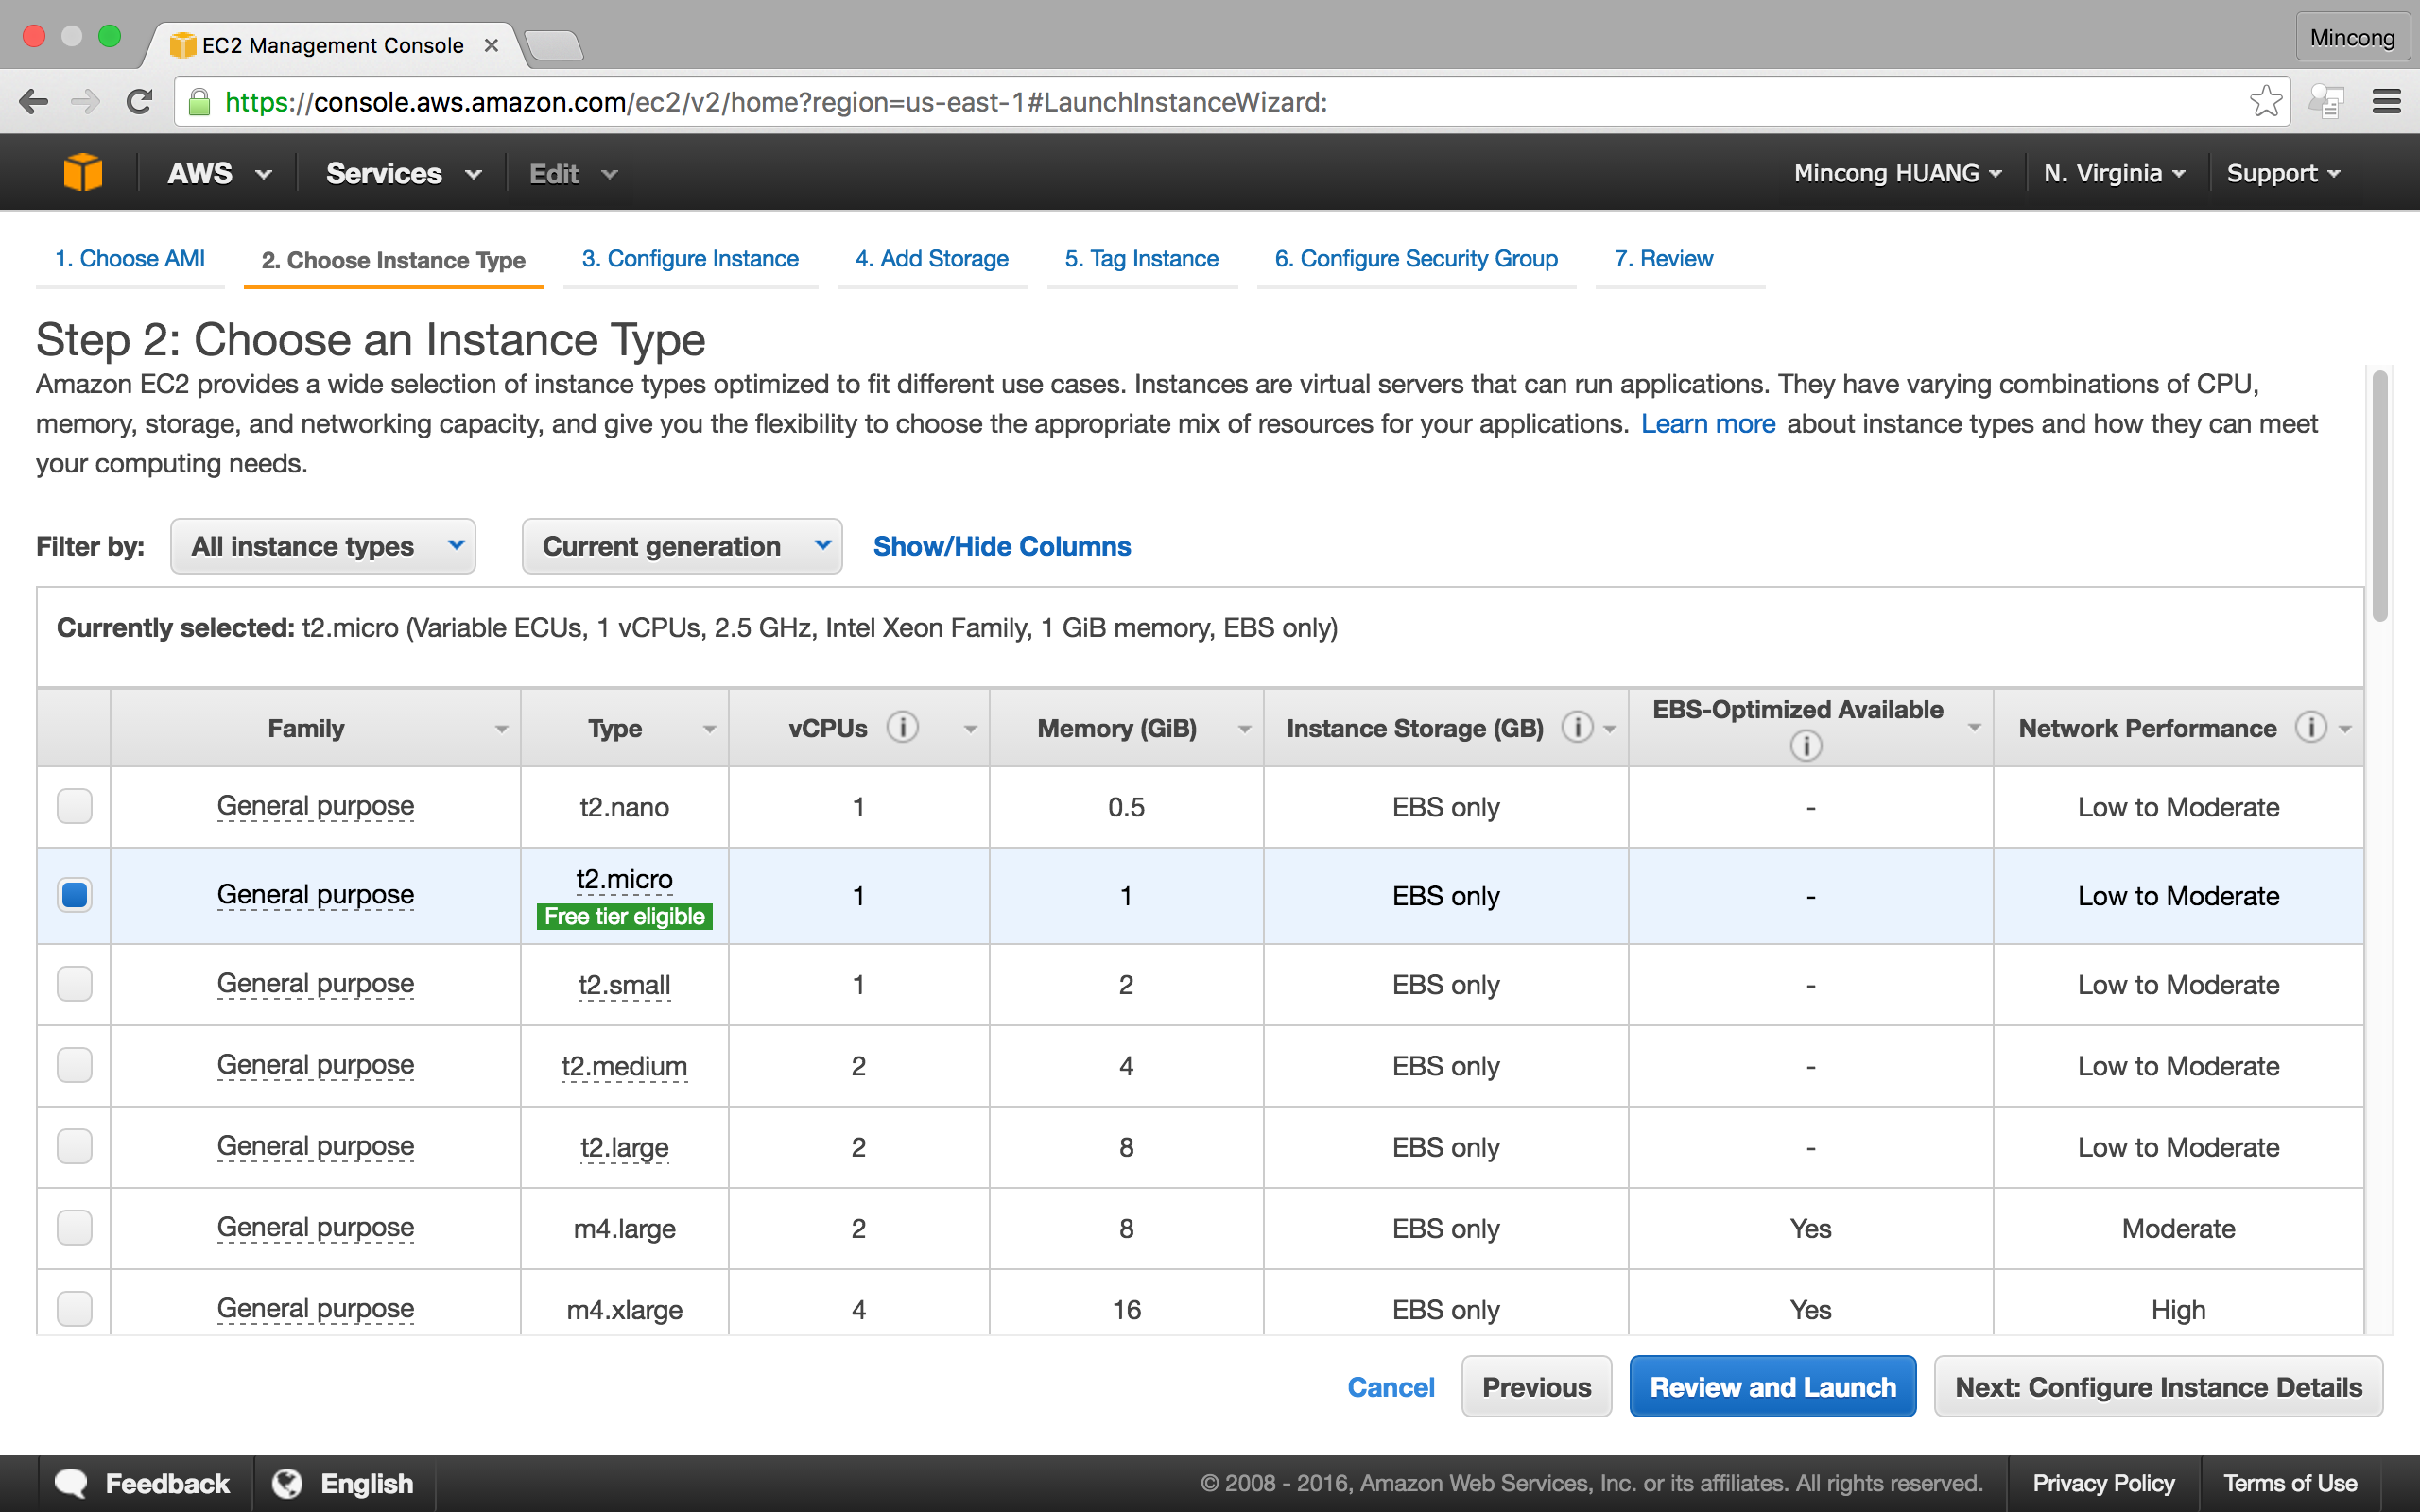
Step 2: Choose an Instance Type
Amazon EC2 provides a wide selection of instance types optimized to fit different use cases. Instances are virtual servers that can run applications. They have varying combinations of CPU, memory, storage, and networking capacity, and give you the flexibility to choose the appropriate mix of resources for your applications.
In this tutorial, the t2.micro type is used, because it is eligible to
free tier. Once finished, click Review and Launch.
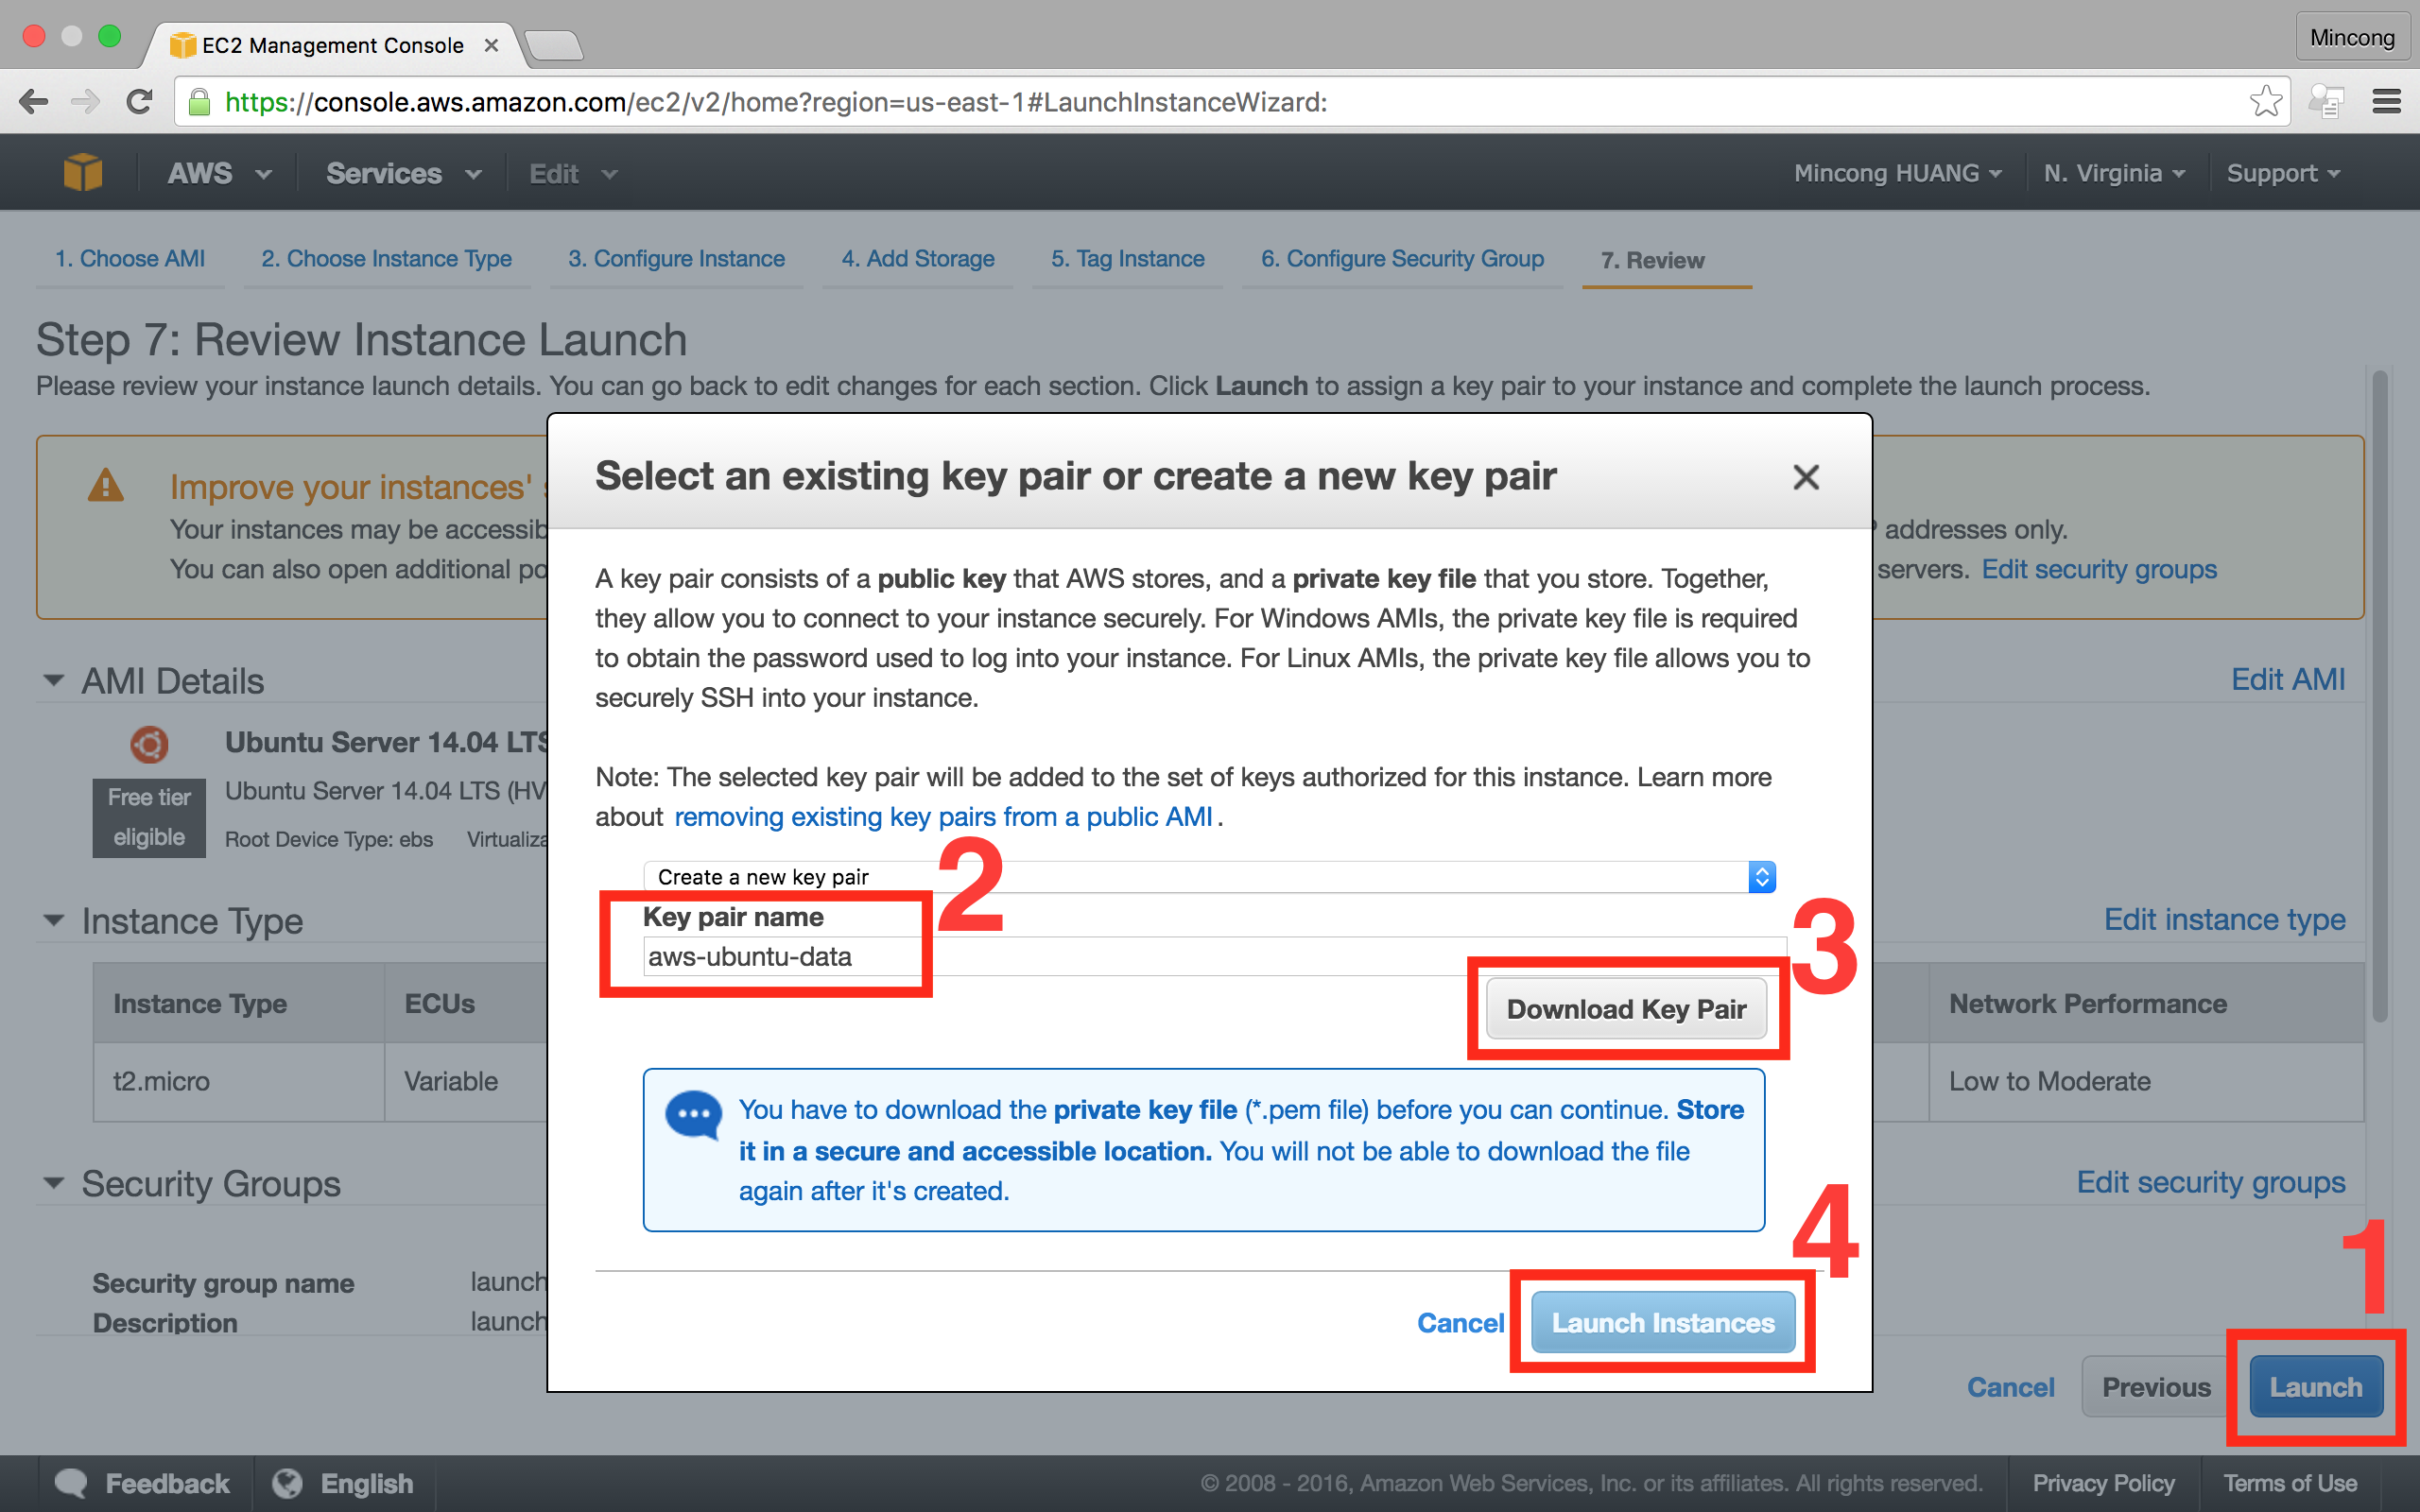
Step 7: Review instance Launch
We’ve skipped all the steps by keeping the default configuration. You can always check the details information to know whether they conform to your usage. Once finished, click Launch.
Then you need to configure a secure key pair for the connection. I’ve named it
as aws-ubuntu-data. Download it when finished. And then launch the instance.
Connect to this instance
Move the key pair to a more secure folder, such as ~/.ssh and change the
accessibility of this file. I’m doing this in Mac. The command line should be
very similar in Linux, but not sure how to work in windows.
$ mv ~/Downloads/aws-ubuntu-data.pem ~/.ssh
$ chmod 400 ~/.ssh/aws-ubuntu-data.pem
Then come back to the EC2 console and try to connect to the server using the connection information provided by Amazon AWS. Select the Linux instance launched previously, click connect button on the top of the page. Then it will show you how to connect.
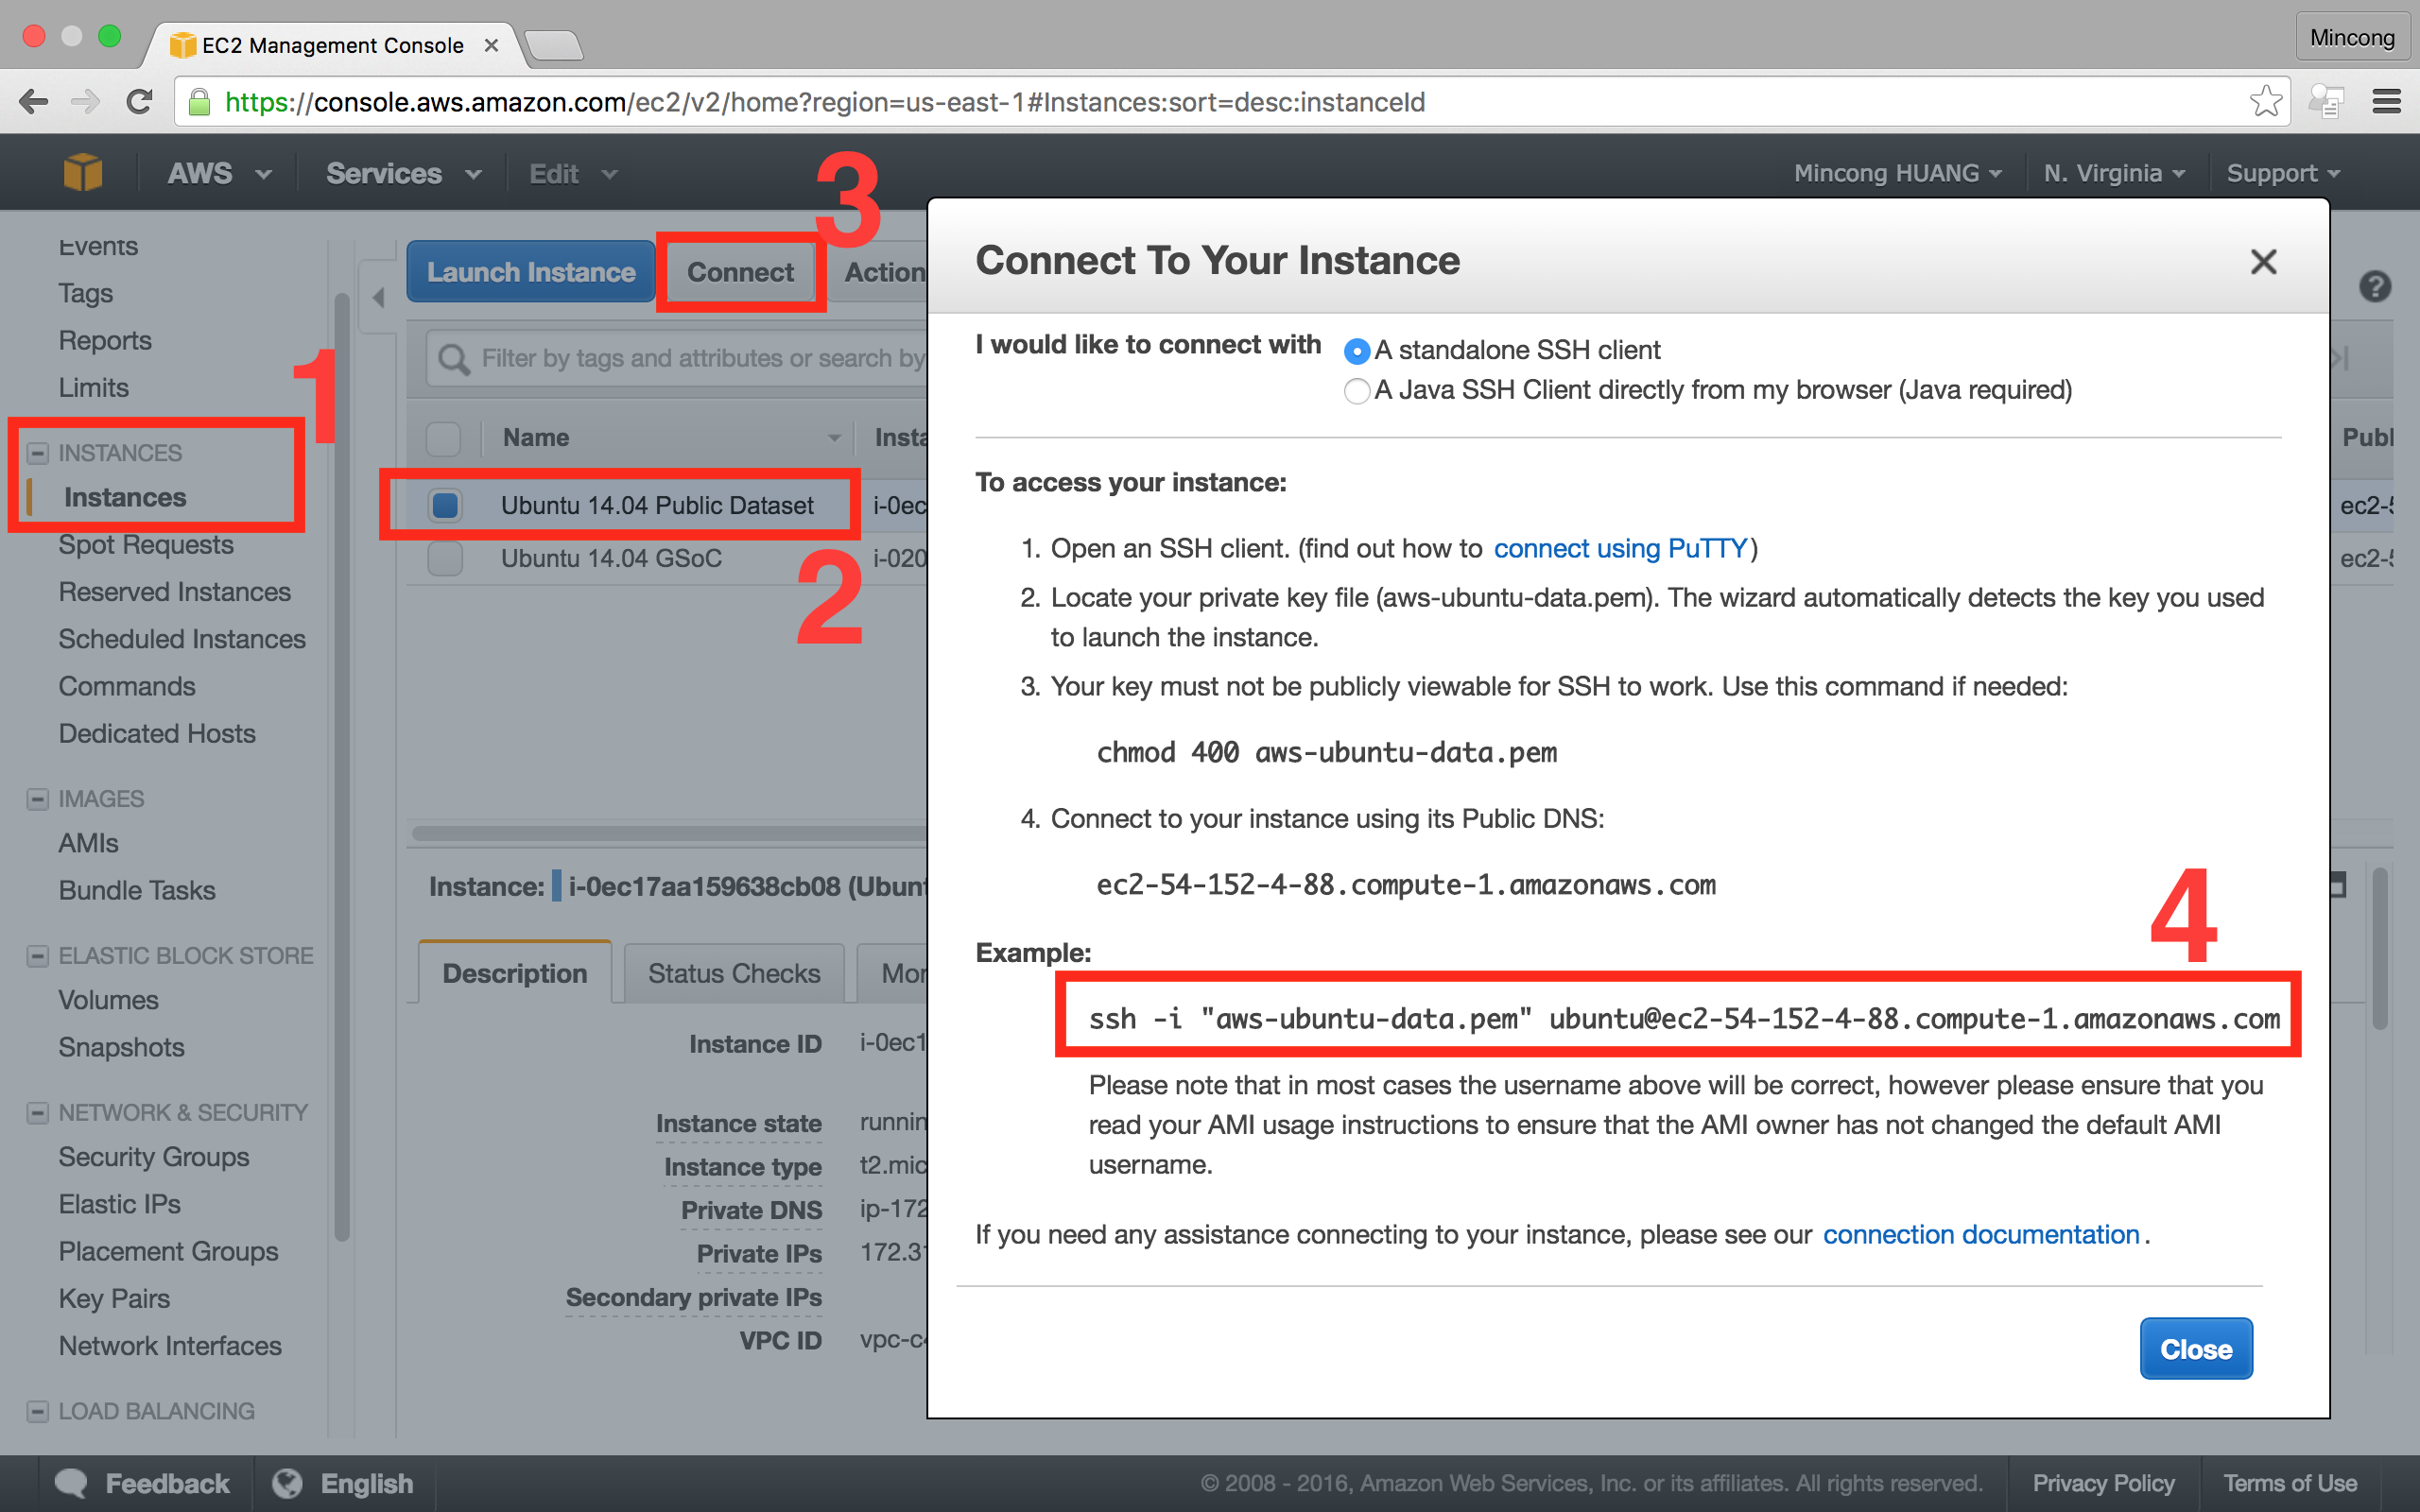
As described in this page, the following command can be used to connect (password is not required) :
$ ssh -i ~/.ssh/aws-ubuntu-data.pem ubuntu@ec2-54-152-4-88.compute-1.amazonaws.comIf everything goes right, you’re now connected to the server. Please maintain the connection and go to the next step : Install MySQL database.
Install MySQL database
Once connected to the Linux server, we can install the MySQL Database using the following command line (in Ubuntu) :
$ sudo apt-get update
$ sudo apt-get upgrade
$ sudo apt-get install mysql-server
More detail can be see here : Install MySQL on Ubuntu 14.04
Make the public dataset volume available for use
Go to EC2 console, select ELASTIC BLOCK STORE > Volumes. Choose the
Twilio/Wigle.net dataset. Click the actions > Attach Volume. Attach this
volume to the Linux Ubuntu 14.04 instance. Click Attach.
rc=”https://mincong.io/assets/20160505-aws-console-EC2-volume-attach.png” alt=”AWS console EC2, attach volume”>
Once finished, use the following guide to make the volume available :
http://docs.aws.amazon.com/AWSEC2/latest/UserGuide/ebs-using-volumes.html
Assume that you’re connected to the Linux Ubuntu 14.04, here’s an recap of all the command lines in the above guide:
ubuntu@ip-172-31-48-60:~$ lsblk
NAME    MAJ:MIN RM SIZE RO TYPE MOUNTPOINT
xvda    202:0    0   8G  0 disk
`-xvda1 202:1    0   8G  0 part /
xvdf    202:80   0  10G  0 disk
ubuntu@ip-172-31-48-60:~$ sudo mkdir /data-us-street
ubuntu@ip-172-31-48-60:~$ sudo mount /dev/xvdf /data-us-street
Copy the data into MySQL Database
Find out the mysql configuration file my.cnf.
ubuntu@ip-172-31-48-60:/usr/sbin$ sudo find / -name my.cnf
/etc/mysql/my.cnf
Find the data storage directory definition in the configuration file my.cnf.
datadir = /var/lib/mysqlSo, it is located in /var/lib/mysql. Now copy the directory
/data-us-street/addresses into MySQL data directory. We do this because the
``/data-us-street/addresses contains all information about the database
addresses`.
ubuntu@ip-172-31-48-60:/usr/sbin$ sudo cp -r /data-us-street/addresses /var/lib/mysqlUse it via any MySQL client
Now, you can use it in your mysql database. For example:
ubuntu@ip-172-31-48-60:/usr/sbin$ mysql -u root -p
Enter password:
Welcome to the MySQL monitor.  Commands end with ; or \g.
Your MySQL connection id is 42
Server version: 5.5.49-0ubuntu0.14.04.1 (Ubuntu)

Copyright (c) 2000, 2016, Oracle and/or its affiliates. All rights reserved.

Oracle is a registered trademark of Oracle Corporation and/or its
affiliates. Other names may be trademarks of their respective
owners.

Type 'help;' or '\h' for help. Type '\c' to clear the current input statement.

mysql> SHOW DATABASES;
+--------------------+
| Database           |
+--------------------+
| information_schema |
| addresses          |
| mysql              |
| performance_schema |
+--------------------+
4 rows in set (0.00 sec)